![]()
9-5-09
 |
 |
|
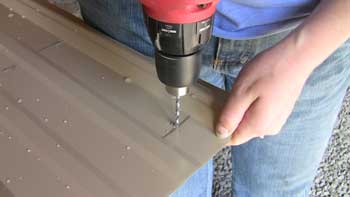
To get the holes to line up from panel to panel, we set our pattern using pencil lines. All of the 18-footers had to be drilled with one pattern, and the 10'6" panels with another pattern. |
Any scratches we spotted on the panels while they were still on the ground got some touchup paint to prevent rusting. A few scratches had to be covered up on the roof since they were made after the panels were in the air. |
|
 |
 |
|
LouElla uses an air nozzle to clean off the metal shavings from the drilled holes. |
Back to drilling on the next set of panels. We stuck to our set of no more than 6 panels drilled at a time. |
|
 |
 |
|
Later, Jillena took over on drilling. Notice all the beaded water on the panel from the overnight dew. |
A bug's view as Jillena drills another hole. |
|
 |
 |
|
This panel is an "upper" - distinguished by the particular pencil pattern starting 2" from the bottom. All of the "lower" panels begin their screw pattern 5" up from the bottom. |
Light reflecting off the many facets of the rib pattern as Jillena continues drilling. |
|
 |
 |
|
All finished. Bring on the next set! |
Outside, Paul, Aaron, and Jeff are stapling the underlayment down. |
|
 |
 |
|
Once all the underlayment was down, Paul and Jeff set their 6-8-10 triangle to get a square line for the first row of panels. Here's a tape measure's view. |
From the ground, you can see the triangle better. |
|
 |
 |
|
As the panels sets were drilled, each one was cleaned off and individually moved outside where they were stacked in the order we'd be installing them. |
One stack is ready to go. The other one will go on top of the pallet in the foreground. |
|
 |
 |
|
The end of a long day. Panels are ready to go up tomorrow. |
As we packed up, a full, orange moon rose over the treeline. |
| <-- BACK TO CONSTRUCTION (FLOOR & ROOF) |
BACK TO OUR LOG HOME MAIN PAGE
If you have any questions about this website, e-mail us at stargazer@stargazerpics.com.
HOME | aurorae | moon & lunar eclipses | night sky shots | landscapes | animals unique shots | our wedding | Alaska 2006 | our log home | Stephen | Oliver | Alistair |
These pages and their contents Copyright © All Rights Reserved.