![]()
5-11-09
 |
 |
|
After securing the scribed panel around the NW GSL at the stairwell, Jeff cuts the scribed end on the adjacent panel. |
View of the panel wrapping around the GSL and its adjacent panel. |
|
 |
 |
|
The panel in the previous picture bumped up against a knot along the wall. We've tried to keep all of the knots on the inside of the house intact, so Jeff scribed around this one. |
A nice fit looking from the opposite side.
|
|
 |
 |
|
At the other GSL, the guys noticed that the girder below the joists must have lifted slightly during the winter because the lap joints had a scissor effect to them. The ends of each joist were a bit higher than just a foot or so back, so these raised tops got planed. |
There was one hangar bracket that was not yet nailed on one side because it was positioned directly behind the GSL. Bob was able to drive a few nails into it with his hammer. |
|
 |
 |
|
Now all the hangar brackets are installed. |
More planing of the lap joints. |
|
 |
 |
|
Bob stands on a new "beater board" and taps the other panel into place that Jeff had scribed for the GSL. |
Even after a seemingly good dry fit, once it was glued down, the panel did not fit well enough along the tongue-n-groove edge because the scribed cut around the GSL was too tight. Since the glue was setting quickly, the reciprocating saw was the tool of choice to gain a little extra room at the back edge of the GSL. |
|
 |
 |
|
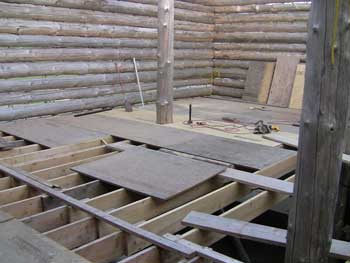
Since this row of paneling lays over the joist lap joints, the panel joints that run parallel with the joists need to transition to the center set of joists which are shifted one joist width to the west. To help support the edge of a panel that will run off the end of a joist, we glued and nailed short 2x4s to the side of the joists. |
Easier seen than explained. Bob nails one of the 2x4 supports to the joist beneath him. This 2x4 extends the joist coming in from the left. The panel joint will lie on the center of that left joist and extend to the center of the 2x4. |
|
 |
 |
|
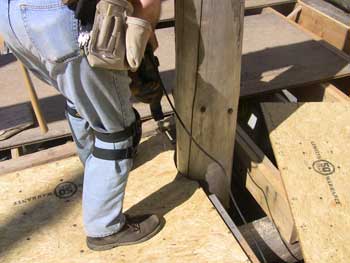
A dry fit is always important. Jeff stands on the panel section he has already measured and scribed, which does not seem to be lining up properly with the GSL. |
Turns out, when measuring the distance from the edge of the panel in which to begin cutting the GSL profile, he added the 3/8" tongue instead of subtracting it. Time to shift the template over a little. |
|
 |
 |
|
Redrawing the scribed template. |
Cutting the template. |
|
 |
 |
|
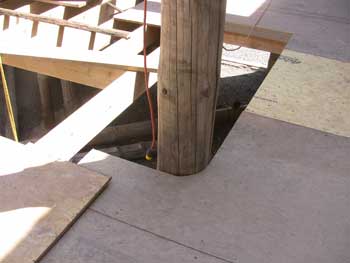
After another dry fit around the pole, the cut was wide enough, but needed to be a little deeper. |
Bob planes more high spots before setting the next panel. |
|
 |
 |
|
A nice fit. The GSL is now enclosed. |
Rough-cutting the end panel section to length. |
|
 |
 |
|
Jeff cuts the scribe line for the log edge. |
The dry fit was good, so the glue gets applied next. |
|
 |
 |
|
Jeff's favorite visitor (next to Jillena, of course). |
Bob fits another panel near the stairwell before the guys called it a day. |
|
 |
 |
|
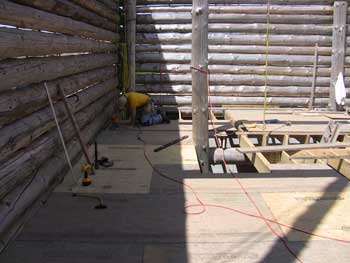
Looking from the north end of the floor at the progress of the west half... |
...and the east half. |
| <-- BACK TO CONSTRUCTION (FLOOR & ROOF) |
BACK TO OUR LOG HOME MAIN PAGE
If you have any questions about this website, e-mail us at stargazer@stargazerpics.com.
HOME | aurorae | moon & lunar eclipses | night sky shots | landscapes | animals unique shots | our wedding | Alaska 2006 | our log home | Stephen | Oliver | Alistair |
These pages and their contents Copyright © All Rights Reserved.